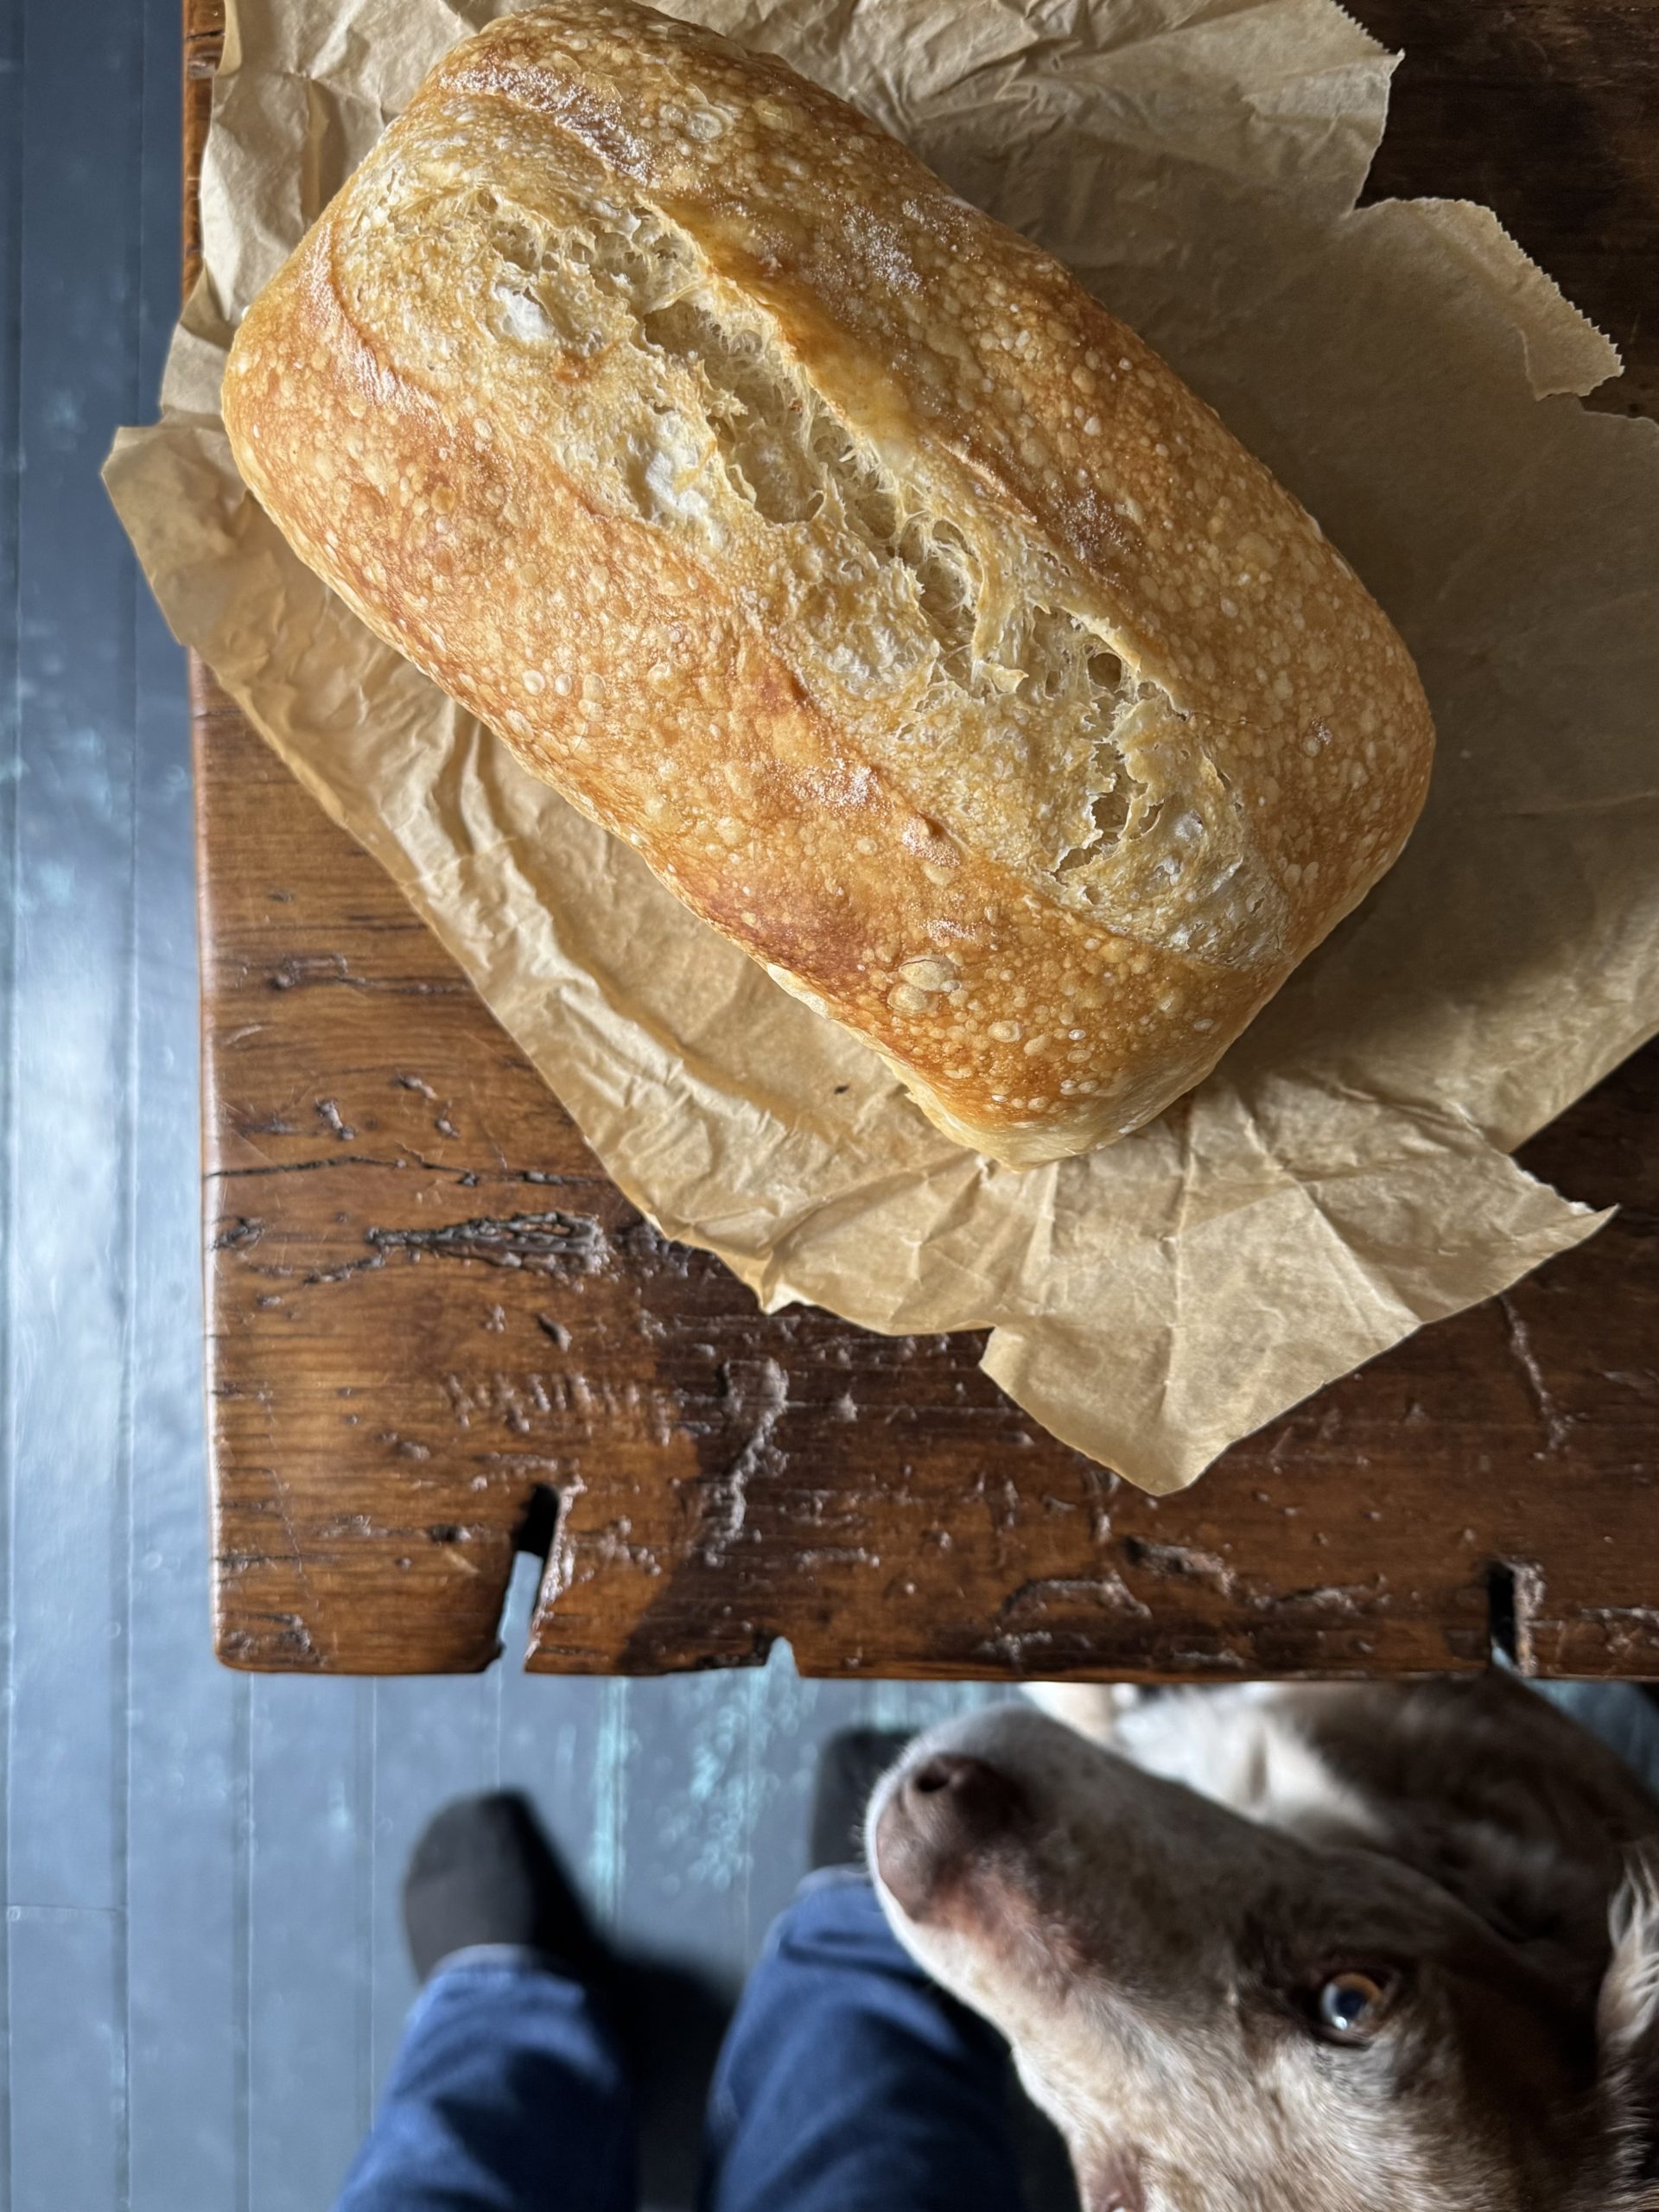
I wanted to start making sourdough without buying a bunch of stuff, so I started with a loaf pan sourdough recipe, which turned out fantastic! My first loaf was a wild success, and I want to show you how I did it, so that you can do it too!
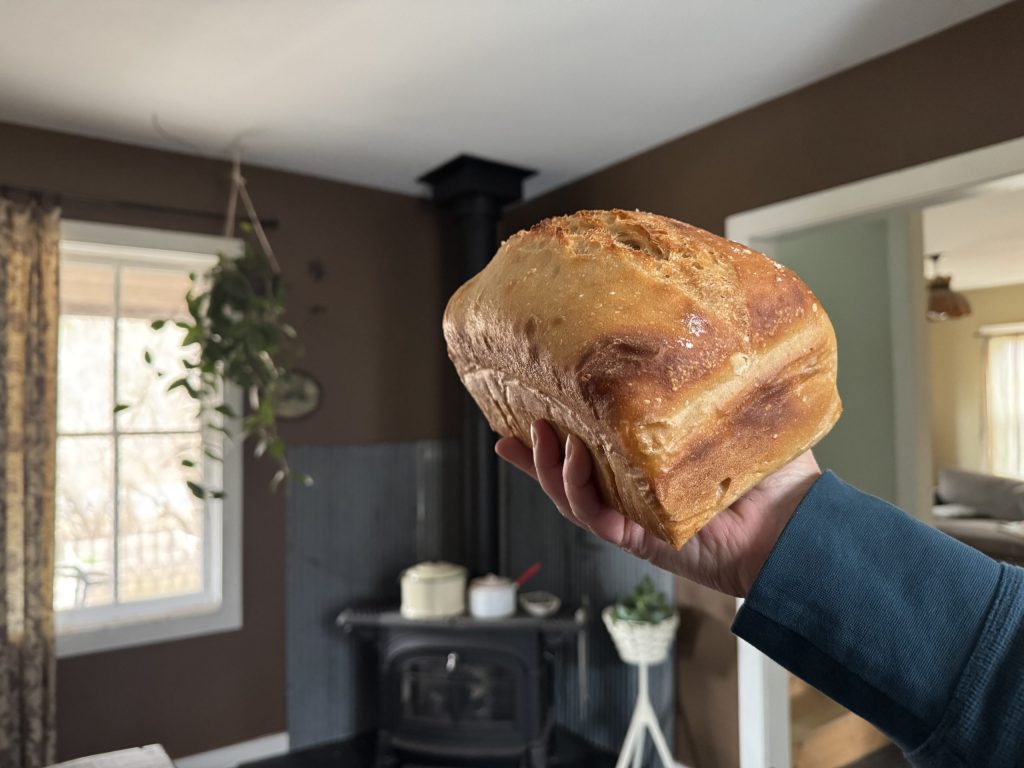
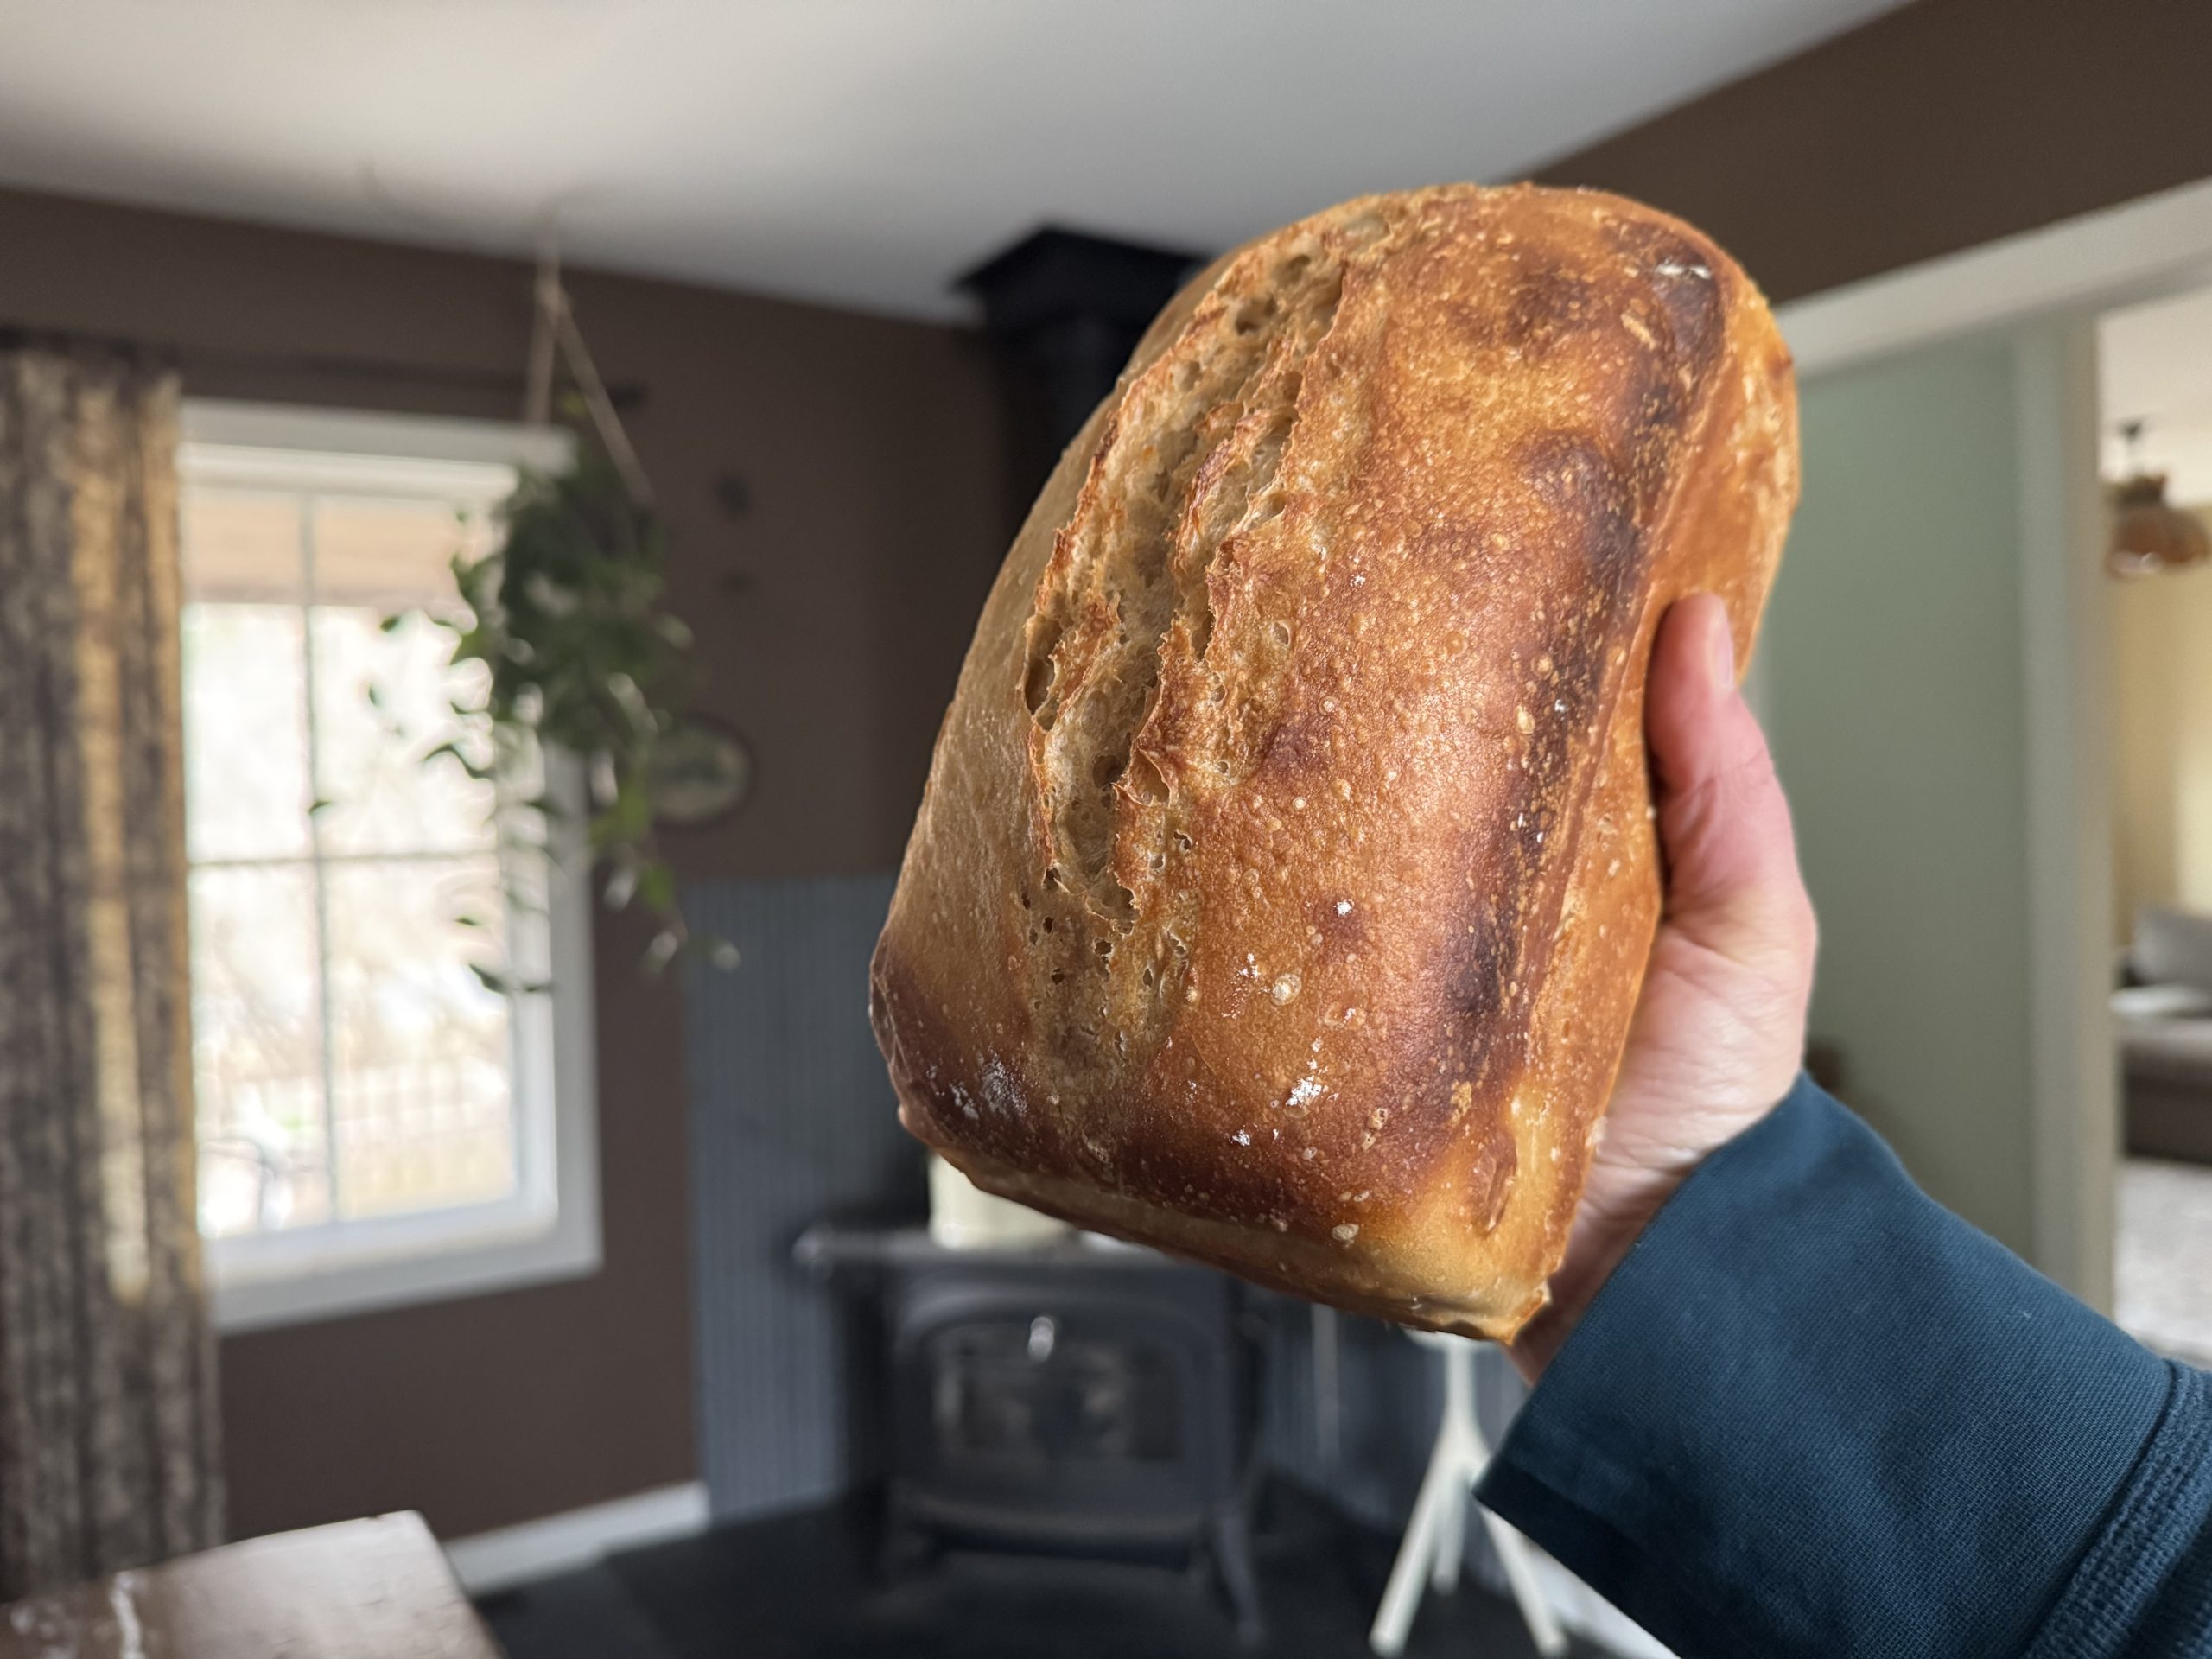
This is an artisan-style bread… crusty on the outside and pillowy on the inside with a nice chew.
It’s everything your dreams are made of, promise.
WATCH THE FULL VIDEO TUTORIAL FOR THIS LOAF PAN SOURDOUGH RECIPE
This recipe is simple to make and basic, incredibly beginner friendly, and has no unnecessary steps and no big words (sourdough speak sometimes feels like a foreign language!). And once you master the basic recipe, you can run with it! You can sub in some whole wheat flour, turn it into a cinnamon raisin loaf, add nuts and seeds on top, swirl cheese and jalapeños through it… whatever you can dream up.
I’m someone who is guilty of jumping into hobbies hard and fast, spending money on them, and then abandoning them, so I challenged myself to make sourdough using only the kitchen equipment I already had. And I know it doesn’t sound like a big deal, because people have been baking bread for tens of thousands of years without fancy equipment… but it felt really special to bake my first loaf pan sourdough recipe without having the big cast iron bread cooker, or the fancy dough whisk, or the baskets. And if you have any desire to make sourdough, I hope you’ll give it a try!
RESOURCES & LINKS
This recipe requires:
-a sourdough starter (find dried starter at Sunrise Mill or from Homestead & Chill)
-two 1-pound loaf pans of the same size (my favorite pans linked here)
-a digital scale (my preferred brand of scale here)
-a larger bowl with a lid or a way to cover the bowl (pyrex glass bowls with covers link)
-parchment paper (link for unbleached parchment paper)
-all-purpose flour (my favorite organic heritage flour 20% coupon code here)
THE STARTER
Before you can mix up your bread dough, you have to activate your starter by “feeding” it. Surprise: it eats flour!
To do this, remove about half of the starter from your jar (this is called the “discard”) then add flour and water to your starter. (You always always discard some before you feed it.)
I know that it’s called “discard,” but DO NOT THROW IT OUT. Put it in another container in the fridge for later… there are a ton of things that you can make with it— more on that below!
You will typically feed the starter in a ratio of 1:1:1 by weight. For a standard loaf, use:
100 g of starter
100 g of flour (which is a scant 1 cup)
100 g of non-chlorinated water (which is ½ cup)
It’s not super important that this is exact. I know about what 100g of starter looks like in my jar, and so I just add 1 scant cup of flour and 1/2 cup of water. Stir everything up in the jar— it should be the thickness of marshmallow fluff (add a teeny bit more flour or water if you need to thicken or thin it).
Put a rubber band around the jar at the level of the starter, so you know the volume that it started at.
Put a lid loosely on the top of the jar, and let it sit on the counter in a warm place.
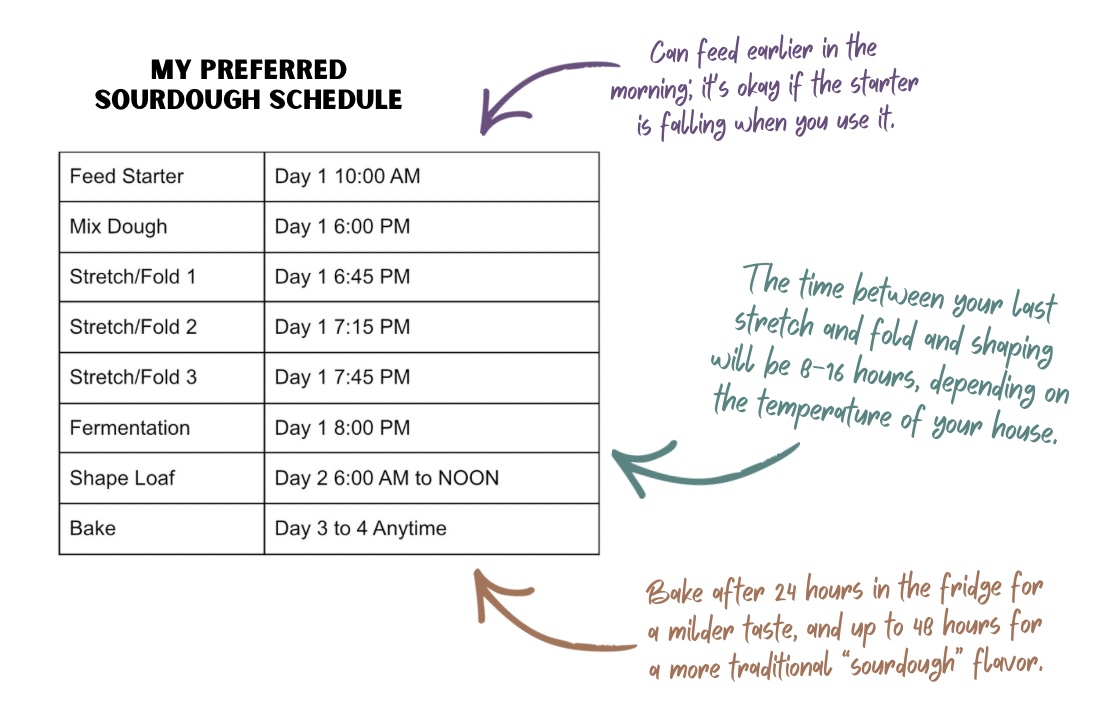
It should double in size in about 5-8 hours (depending on the temperature), and this is when you want to use it. You can use it when it’s doubled, or is on its way down after doubling. (Just try not to use it before it’s doubled.)
Weigh out the active starter that you need for the recipe and put the starter jar back in the refrigerator. When not being activated for baking, store your starter in the fridge.
If you do not make bread about once a month, you need to at least feed the starter. This looks the same as feeding it for baking: discard about half, stir in the equal weight of flour and water, let it peak, and then stick it back in the fridge.
The Flour
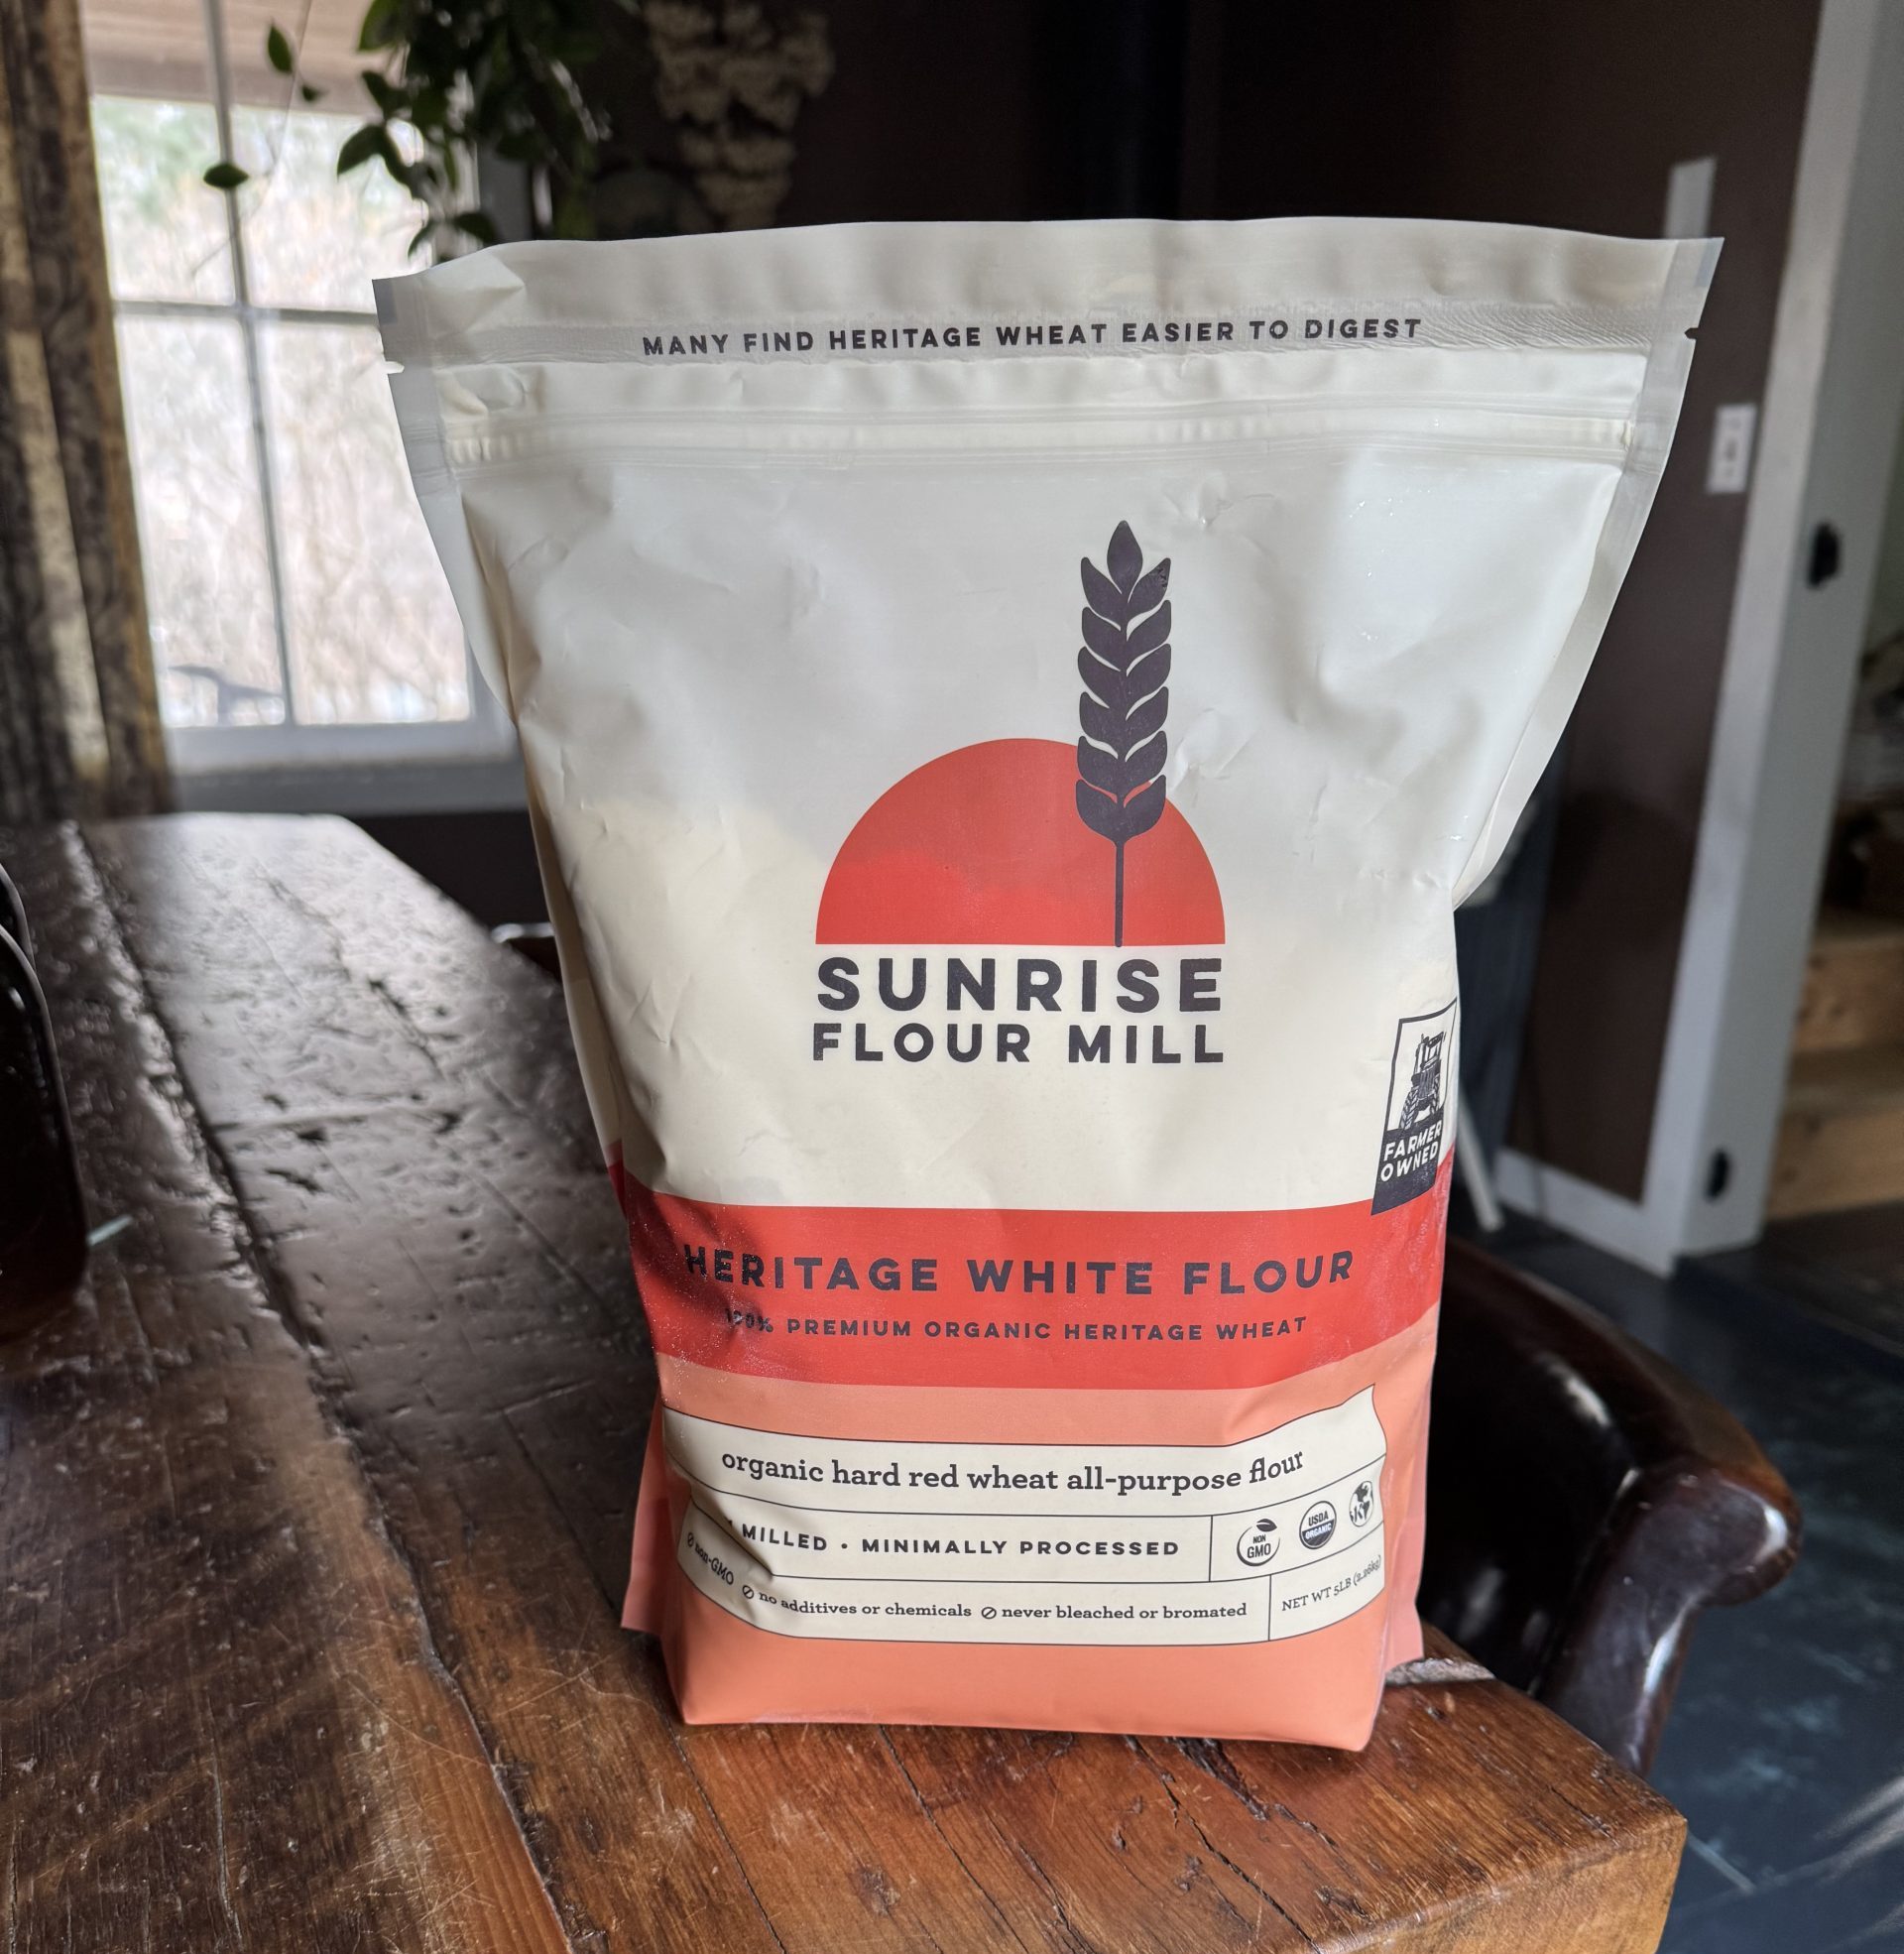
I’ve made this bread successfully with Bob’s Red Mill All-Purpose Flour, but my favorite is Sunrise Flour Mill White Flour. SUNRISE MILL COUPON CODE: New customers (or those with a new email address) can get 20% off their first order with my affiliate link –> here!
Why I like them:
HERITAGE GRAINS: Sunrise uses heritage grains, which is wheat varieties that have been around since the 1950s– I think that’s so cool! Besides being cool, they have a different structure of gluten (that’s really simplifying it), but people who have trouble with gluten can typically digest these better. If you didn’t know, I am a gluten-free person who can eat long-fermented sourdough.
BETTER THAN ORGANIC: They are certified organic, which is important to me, but I consider then “better than organic” because they also test for glyphosate and heavy metals.
FINE MILLING: Sunrise uses a mill that grinds the flour very finely, so even their 100% whole wheat flour bakes up very light and lofty. It’s really gorgeous, really tasty flour! I have tested my recipe here using 25% Sunrise Whole Wheat Flour (for this recipe that is 300g white flour and 100g whole wheat) and it is excellent.
MAKING THE DOUGH: Loaf pan sourdough recipe
100g active starter
270g non-chlorinated water
10g sea salt
400g organic all-purpose flour
Once your starter is peaked, weigh out 100g into a large mixing bowl.
Add the water and salt, and stir until the starter is dissolved into the water.
Use a large fork to stir in the flour, then switch to using a spatula or your hand to mix it around for a couple minutes until it is a shaggy dough ball. It will look kind of rough on the outside, and that’s okay.
Cover the bowl with plastic wrap or an airtight lid, and let it sit for 30 minutes for the flour to hydrate.
Then, do the first set of stretch-and-folds (see video posted above). This is going to help the dough come together more and contribute to a light airy texture. Do a total of three sets of stretch-and-folds, each about 30 minutes apart. For each set, stretch and fold the dough about 6 times.
After the last set of stretch-and-folds, loosely put the lid on the bowl or cover it, and leave it to ferment at room temperature, or “bulk ferment.”
ROOM TEMPERATURE FERMENTATION
The dough will go through two different fermentations: one at room temperature, and then one in the refrigerator after it’s shaped and in the pan.
This room temperature fermentation is probably the most critical step to get right in making sourdough.
If it doesn’t ferment enough, your bread will be “underproofed” and dense. If it ferments too much the dough will be “overproofed” and deflate.
At 70°F room temperature, the bulk ferment will take about 8-12 hours. If the room is colder it will go slower by up to several hours, and if the room is warmer it will go faster by up to several hours. (In my 60ºF house it takes about 16 hours.)
To know the room temperature fermentation is perfect, I look for the dough to have doubled in size and for it to have a jiggly quality (see video posted above).
SHAPING
Now the dough is ready to shape into a loaf!
Prepare a loaf pan by fitting a piece of parchment paper nicely and tightly in it.
Very lightly flour the counter, and pour the dough out onto it. Use more flour if needed… this dough is a little on the stickier side (but don’t use more flour than you absolutely need to). Shape it into a round shape, pulling it into a ball on the counter with your hands. Then form it into a rectangle and trifold it like a letter. Turn the dough 180º and roll it into a spiral (see video posted above).
Place the dough into the pan, and then cover it well. I stick mine (the whole loaf pan!) in a 1-gallon or 2-gallon size Ziploc bag. Place the whole thing into the fridge to cold ferment overnight.
It can stay in th fridge for up to 48 hours (the longer, the more sour) before baking.
BAKING
To bake, preheat the oven to 465°F.
Sprinkle the top very light with flour (just down the center where you will cut it) and make a ¼-inch deep slit down the length of the dough with a very sharp knife.
Place a second loaf pan inverted over the top of the pan and bake for 30 minutes.
Lower the oven temp to 430°F, remove the top pan, and bake 15-20 minutes longer, until deep lovely golden brown.
Immediately remove the loaf from the pan using the parchment paper as handles. Allow the bread to cool before slicing.
Congrats! You’ve made your first sourdough loaf pan recipe!