

Preserving season is upon us! So many people have jumped on the “raise your own food” bandwagon recently, and I think that’s fantastic! Come on in folks, the water is mighty fine! I am glad that so many people are taking an interest in providing for themselves. I know that once we got a taste of homegrown food, we were forever spoiled and don’t want anything else. And there’s nothing more satisfying than preserving it yourself!
Baby chicks and garden seeds have been selling out everywhere for months, and I see the trend continuing. Everyone who is now growing their food is going to have to preserve it… and that means a likely shortage of preserving tools and supplies.
If you’re planning on preserving your own food this season, I put together my favorite items, grouped by preservation method. I’m stocked up and ready for the growing season- I hope you are too!
Food Preserving: Freezing
Freezing is my absolute favorite preserving method. It is often the most simple and least labor-intensive, the food retains a lot of its nutrients, and I generally prefer the taste and texture compared to other preserving methods.


The downside to freezing is that freezer space can be limited, and if the power goes out you’ll have a big problem on your hands real quick (unless you have a backup plan!). A backup generator is a great thing to have if you’ve got a freezer filled with important food.
Freezers
I always prefer a chest freezer to a stand-up one. The food stays colder and is less subject to temperature swings by the opening and closing of the doors. This equals less freezer burn and your food lasting much longer. My frozen meat and vegetables can easily last 2-years in a chest freezer. I suggest you get the biggest one you can afford and have space for- we like the ones in the 20-25 cubic feet range.
One complaint I hear about chest freezers is that food gets buried and forgotten about at the bottom. I don’t find that to be the case at all because we use “banana boxes” to store our food in. We can just lift out the upper boxes to get to the lower boxes and it works great!
Freezer Protection
All that precious food needs protecting. I’ve seen it happen many times to other homesteaders: power goes out, something goes wrong with the freezer, or maybe the kids or the goats rip the cord out of the socket… and all your food spoils before you catch it. Totally devastating. And totally preventable!


We use a SensorPush sensor in our freezer, which connects by bluetooth to our phones, and alerts us if the temperature in the freezer goes out of the range we pre-set to alert us at. It’s such a valuable gadget for peace of mind. Modern-day homesteading at its finest!
Freezer Bags
I wish there was a better way… but until there is, I will continue to use zip-top freezer bags for preserving my frozen produce. I prefer the name brand ones because I think they are thicker and better performing, worth the slightly higher cost. All freezer bags are not created equal!
Make sure you’re getting “freezer” bags and not “storage” bags, as there is a huge difference and storage bags will not keep your food long term.
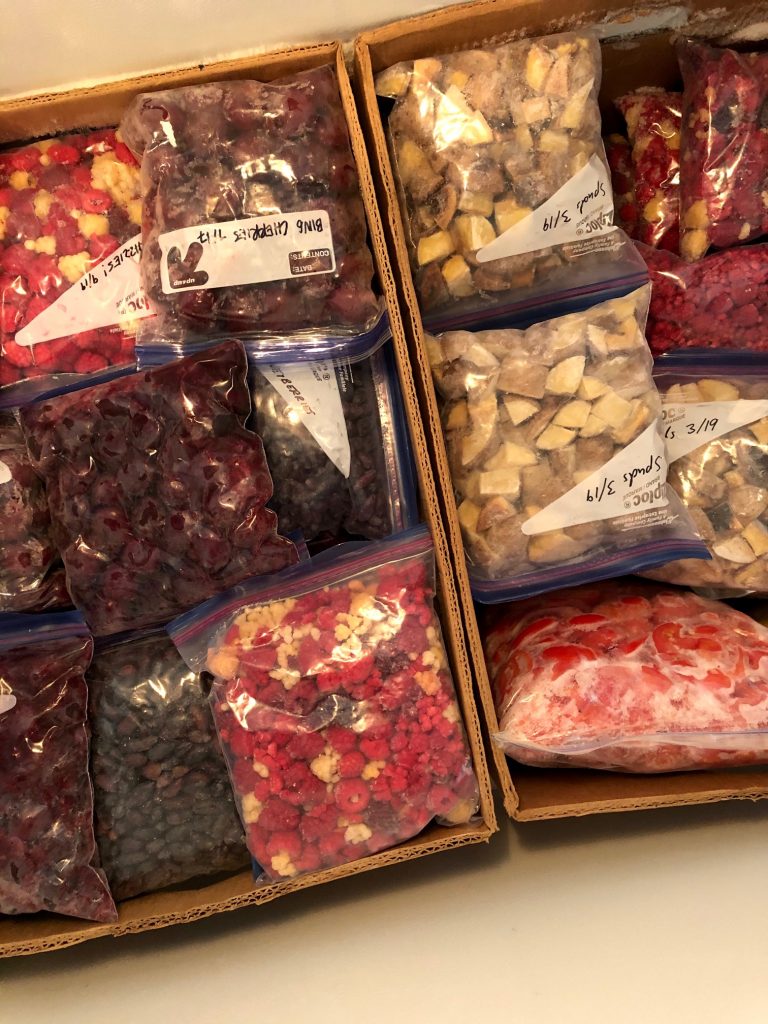
I stock both quart-size freezer bags and gallon-size freezer bags, but I use the quart size most often. This is what I store most of my frozen garden fruits and veggies in.
If you really want to stock up, you can buy a large bulk box of gallon-size freezer bags, which is a much better deal.
Reusable Freezer Containers
If you follow me on Instagram, you’ve heard me sing the praises of these containers for years now! I absolutely love them and have them in a few different sizes for different purposes.
They are made of thick food-grade plastic, are reusable for years, don’t get brittle when frozen, and don’t hold stains or odors. They do a fantastic job of preventing freezer burn and preserving your frozen goods for the long-term. Plus they are very affordable! I don’t like to freeze things in glass because the risk of breakage is high, so these are a great alternative.

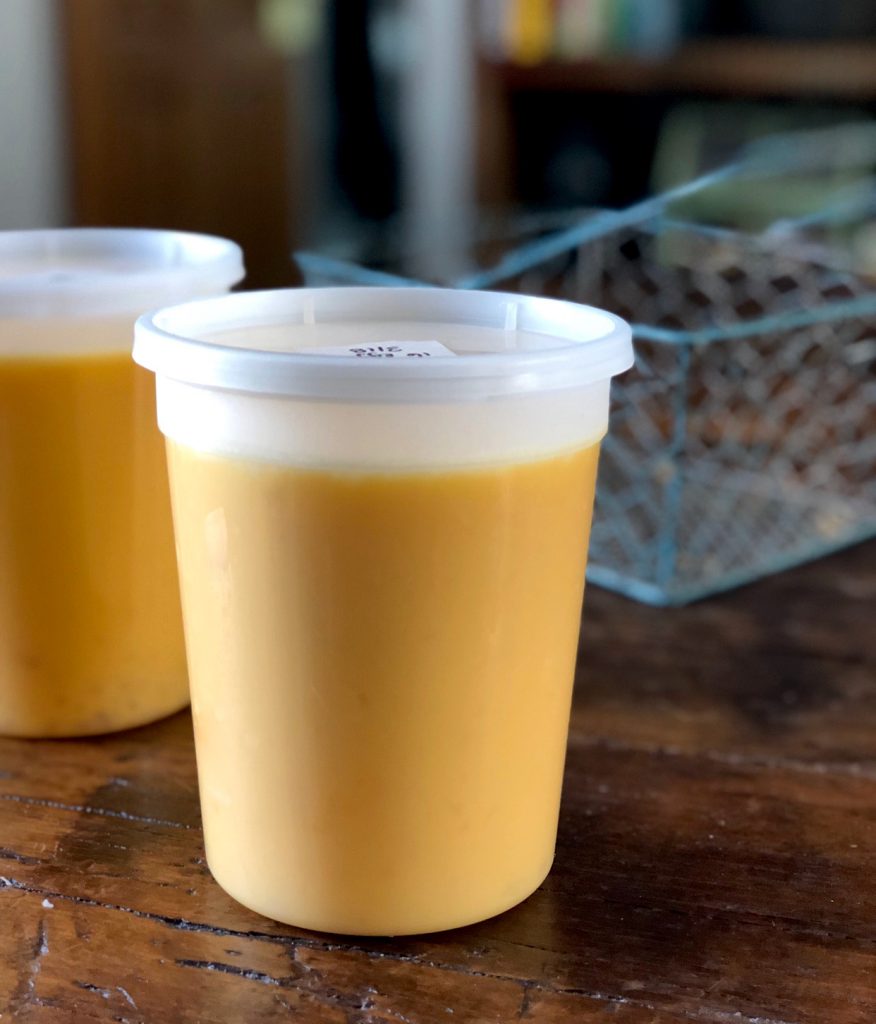
The large 32-ounce size is my favorite for freezing eggs. Didn’t know you could freeze eggs? Check out my instructions here! These are also the perfect size for freezing homemade bone broth, fruit juices, and my veggie-loaded marinara sauce.
The medium 16-ounce size containers are my favorite size for leftovers, one-person servings of soup, and smaller portions of broth or eggs.
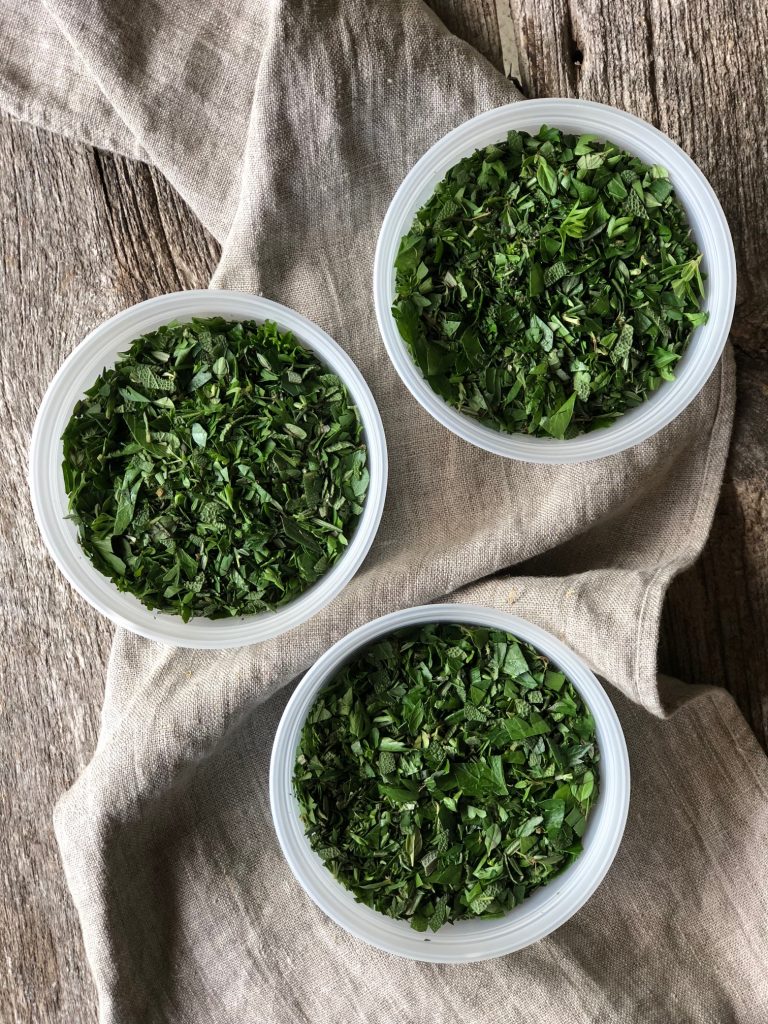
The small 8-ounce size containers work well for homemade sauces like pesto, or pizza sauce. This is my preferred container size for freezing fresh herbs like my Scarborough Fair Herb blend, mushrooms, and other odd bits that I use in smaller amounts.
The company that makes these also makes containers that aren’t meant for the freezer, so make sure you get the ones that say “extreme freeze.”
Freezer Paper
If we’re freezing meat, I prefer freezer paper. Please note, “butcher paper” is NOT the same as freezer paper, and most butcher paper is not thick enough to protect food long term. Freezer paper is coated with wax or plastic on one side, which prevents meat juices from leaking through.
Not all freezer paper is created equal- some brands are incredibly thin and are only meant to retain food quality for 3-6 months in the freezer. The thickness of paper is described as weight in pounds, and I won’t get anything less than 45# freezer paper. If they don’t list the thickness anywhere, that’s probably not a good sign.
Vacuum-Sealing
While there are a lot of different vacuum-sealing units meant for home preserving use, the advice I have heard is to go with a commercial or professional unit if you plan to use it a lot or are butchering animals yourself, because the smaller home versions tend to burn out very quickly.
This Weston Professional Vacuum Sealer is the one that several homesteading friends have all recommended.
Food Preserving: Canning
I don’t do as much canning as I once did… it’s maybe a little bit of laziness mixed with the fact that if something can be frozen, I prefer that route.
But canning does have its place, and is an incredibly valuable skill to have, especially with the uncertainty of the world at this time. Having shelf-stable food ready to go, and not depending on electricity to keep it is the ultimate peace of mind!

If you’re new to canning, you MUST learn how to safely can, and follow instructions and tested recipes. You can’t just make stuff up when it comes to canning. On the other hand, please don’t be afraid of canning- once you understand the basics you’ll see it’s very simple and easy to do safely.
Canning Resources
I learned canning safety from the Ball Complete Book of Home Preserving. They are a fantastic authority for safe canning, and every canning enthusiast should probably own this book- it has all your basic canning recipes and instructions.
There are a lot of other great canning books that have interesting and inventive recipes that are also trustworthy and safe. I love Can It & Ferment It by Stephanie Thurow, and Food in Jars by Marisa McClellan.
Canning Pot
Let’s differentiate for a minute- there’s water-bath canning and pressure canning, two slightly different processes for different types of food. I’ll let someone else, like the Ball Book I mentioned above, give you all the details about those methods and when to use which.
If you want to pressure can, you’ll need a “pressure canner.” A pressure cooker is not the same thing. I have the 21.5 Qt All-American Pressure Canner, which I really like- it’s an investment, but it’s the kind of thing that will last your entire lifetime. I was drawn to this brand because it doesn’t have rubber gaskets that need to be replaced every few years.
For water-bath canning you’ll use a regular canning pot. I have used and loved the really simple, light-weight 21 Qt Granite Ware brand for years. They are relatively inexpensive, last a long time if properly cared for, and they do a great job.
Canning Tools
There are only a few others tools you’ll need to get started canning- two absolute musts are a jar lifter and a jar funnel.
While you can get these things in a large set with a few other tools like a magnetic jar lid lifter and a headspace tool (not necessary), I prefer to cherry pick and get a little better quality tools. These sets come with plastic jar funnels, and I prefer a metal one. When ladling your foods into jars, it’s often boiling hot, and pouring hot food through plastic isn’t ideal.

I use a stainless steel jar funnel, which works well plus cleans up really nice since it’s metal. Jar lifters are what you use to lift the hot jars in and out of the canning pot. I like this heavy duty jar lifter from Norpro.
Canning Jars
Where to start? I typically get Ball brand jars– they are readily available where I live, they are very good quality, reasonably priced, and this brand has stood the test of time. I also really like Kerr brand jars. While cheaper generic jars are available, I think you get what you pay for here, so I stick with the ones I know and trust.
Jars come in regular and wide mouth, and I try to use regular mouth as much as I can because I feel they seal more securely. Wide mouth are nice if you’re filling your jars with something like large pickle spears though. It’s also simpler for buying supplies to just stick with one type of jar mouth and lid… so I use almost exclusively regular mouth.
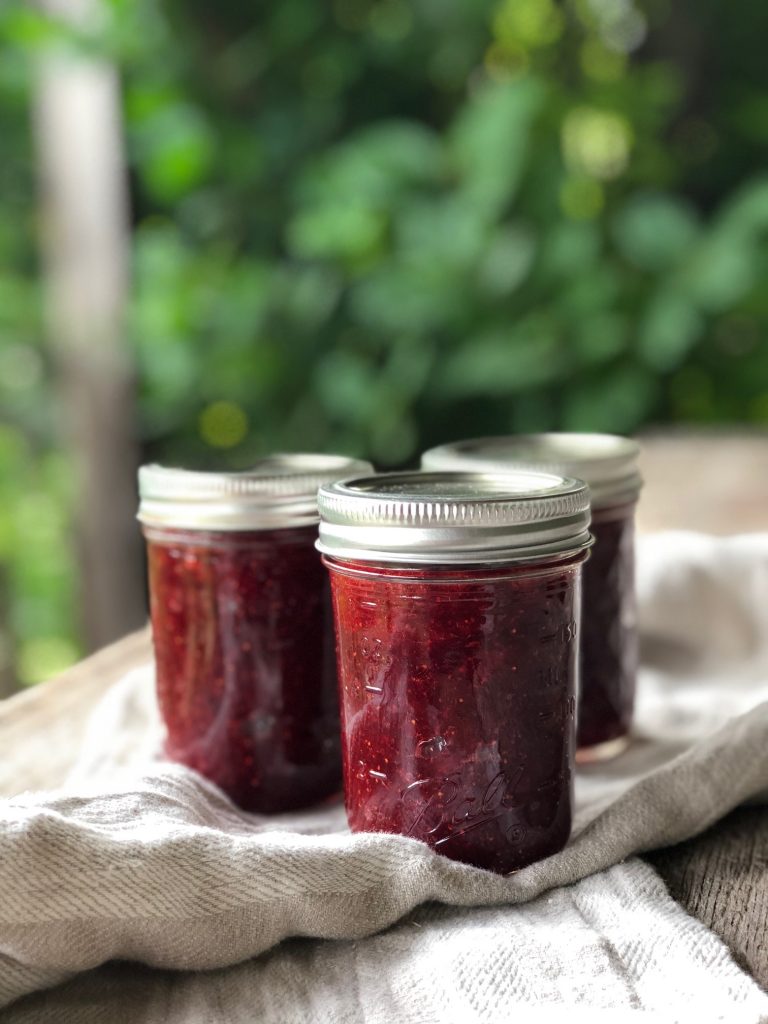
I use primarily quart jars, some pint jars, and some jelly jars. The size of jar you should use will be dictated by what you’re canning and how big your family is. Quarts are nice for canning things like peaches, pears, and apples. I like pints for doing salsa and relishes. Of course I use jelly jars for jams and jellies, like my Strawberry Sun Jam!


Remember that conventional canning lids should only be used one time. If I am canning something we will finish before it goes bad in the fridge, I will choose to can in quarts, so I use less lids overall.
Canning Jar Lids
I think these will be a hot commodity come harvest season… I also tend to prefer Ball brand jar lids as well, because I have used them for years and know they perform well.
There are cheaper types, and you might have to take what you can find. I will say, I have used both Ball jar lids and generic ones, and I can count on one hand the number of failed seals I’ve had in my ten years of canning.
The typical price for a box of 12 new lids is around $2 to $3… so don’t get cheated here. I usually buy these at our local farm supply store or Menards.
You can also find reusable canning lids which I know many people like, but I haven’t personally used them. They are more expensive, yes… but how wonderful that they are reusable for years!
Citric Acid for Canning
Many canning recipes call for citric acid to ensure that your recipe has enough acid to be canned safely. You can often use lemon juice in its place if the recipe allows, which is what I prefer.
Vinegar for Canning
All you pickle-makers out there, don’t forget to stock up on both white distilled vinegar and apple cider vinegar for all your pickling needs!
If I can’t find organic vinegar, I prefer Heinz brand Distilled White Vinegar– it’s a little more expensive, but I think it has the best taste, and it’s made from grain, not petroleum.
Be aware, you want 5% vinegar for canning… some cheap brands are 4% and won’t be safe to can with. There are also very high strength vinegars (usually 30%) that are made for cleaning, not canning, so don’t get those.
Sugar for Canning
If you’re planning any jams or jellies, you will need something to sweeten it with. I prefer organic cane sugar over regular white (GMO) sugar.
I also like to use a little honey in my canning- it adds a light floral note that goes really well with fruit.
Pectin for Canning
You might need pectin, depending on what type of jam or jelly you like to make. I like Pomona’s Universal Pectin best because it allows you to make jam with a lower amount of sugar.
I’ve had success with both traditional classic liquid pectin and powdered pectin too.
Salt for Canning
Pickling salt and kosher salt are often called for in canning and preserving. Gosh I hope there isn’t a supply problem with salt, but probably best to make sure you have plenty on hand!
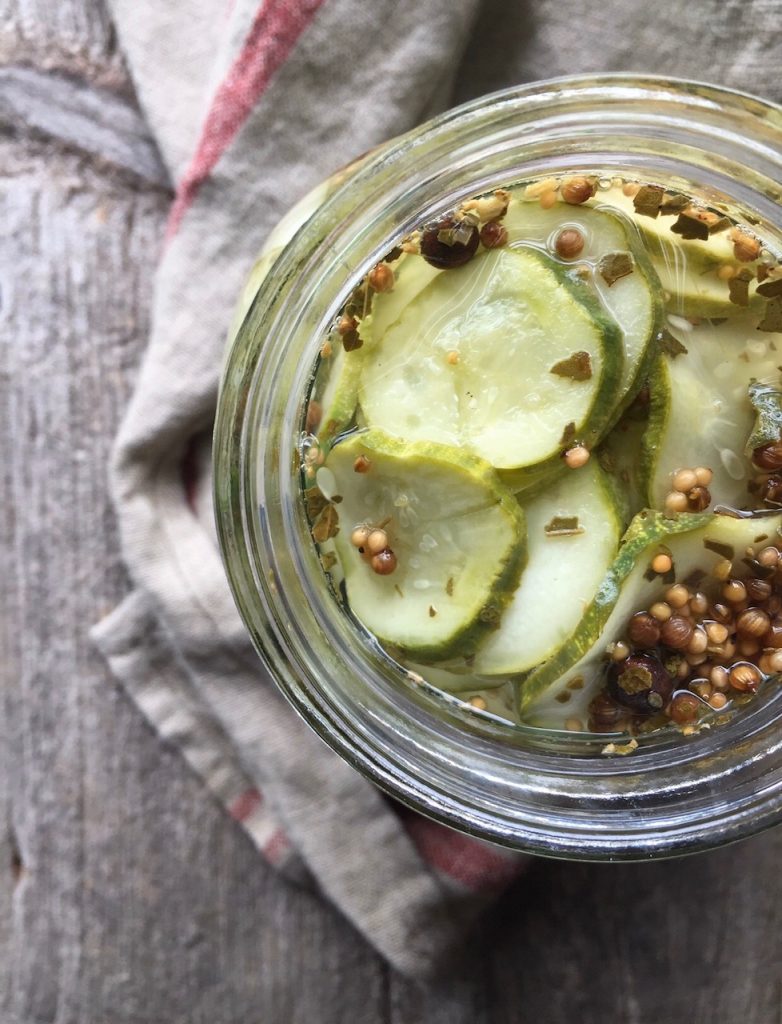
Pickling Spices for Canning
Frontier has good quality spices- they make an original flavor meant for sour pickles, and a sweet spice blend meant for sweet pickles.
Food Preserving: Dehydrating
I love the process of dehydrating foods, especially ones we grew ourselves! Making dried apple chips, fruit leather, garlic powder, and drying herbs are a few of my yearly staples!
Food Dehydrator
If you’re going to invest in a food dehydrator, I would highly recommend one that has a temperature control, and a fan and heater that blows across all the trays evenly at the same time. (As opposed to a dehydrator with the heating element on the bottom and the trays stacking on top of it.)
I have used and loved my Excalibur Dehydrator for nearly 10 years now and it’s still going strong! Excalibur has a few different models available depending on what your needs are.
If I were going to get a new dehydrator, I would spring for the Excalibur model with the stainless steel trays. The less my food comes in contact with plastic, the better… especially when you also add in heat.


I have the 9-tray 3900 model with plastic trays, which is still awesome. My dehydrator doesn’t have a timer, and I don’t miss having one a bit. There is a “budget” 2900 model with less power, less life, and less warranty but it has great reviews and should perform wonderfully as well.
If you are tight on space, they also make a shorter 5-tray model.
Fruit Leather Sheets
One of my favorite dehydrator accessories is a set of fruit leather sheets, which I find to be very necessary for the types of things I dehydrate.
These are silicon lined flexible sheets that sit on top of the plastic mesh dehydrator trays. These are the sheets that you spread fruit puree onto for fruit leather. I also use them for drying small herbs and finely chopped garlic that would otherwise fall through the plastic mesh.

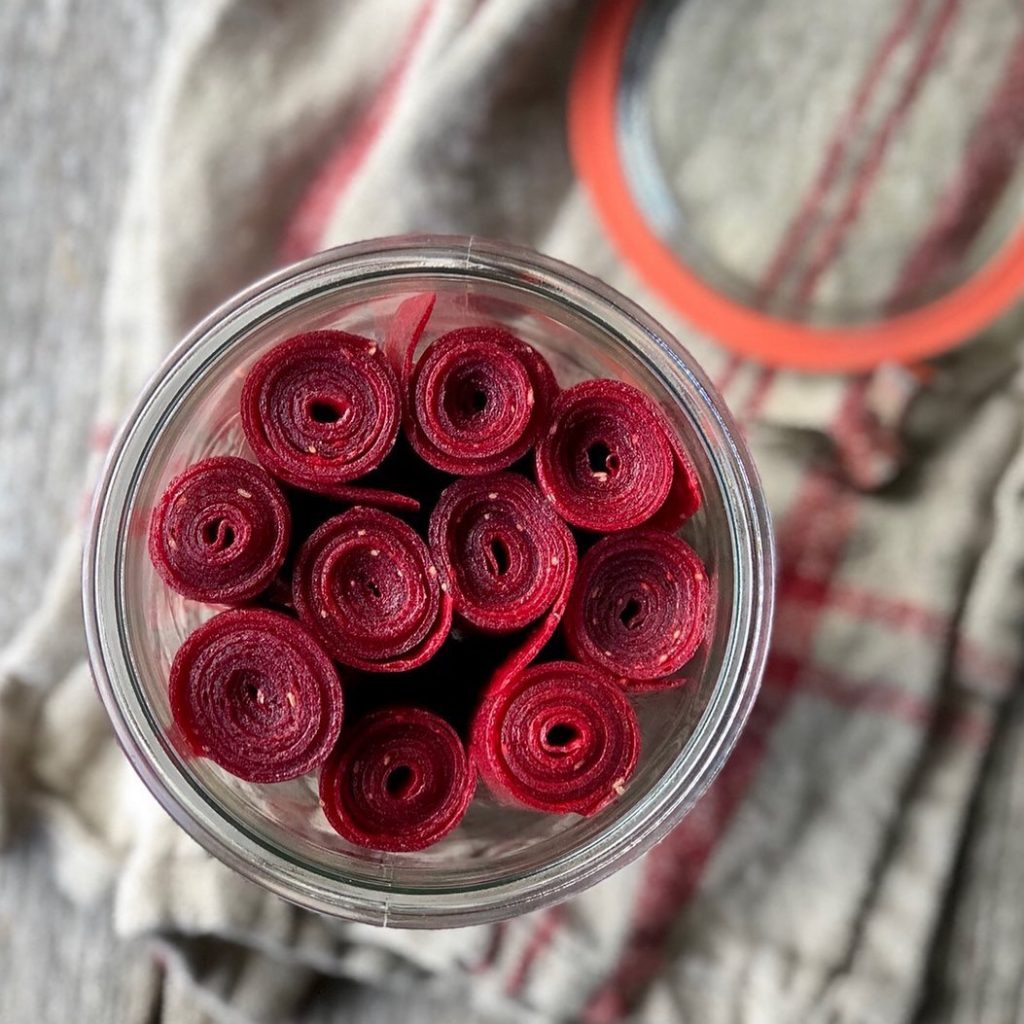
Food doesn’t stick to them, so you can pull the fruit leather right off, and they clean up nicely and don’t hold any smells (like garlic!).
Herb Drying Rack
While I always prefer to dry my herbs in the dehydrator when possible (the faster your herbs dry, the more color, flavor, and nutrients they retain) I also have an herb drying rack. Sometimes I’m short on time, and quickly tying up some herb bunches and hanging them up to dry is a life-saver!
Plus I love how rustic and old-timey herbs look hanging in the kitchen!
Large Storage Jars
If you are dehydrating a lot of food, I would recommend half gallon glass jars for keeping your dried goods stored. You’ll fill up a lot of quart jars really quickly with something like a big batch of dried apples! You can store dried goods in freezer bags, but I often find that those foods can have sharp edges that pierce the bags.

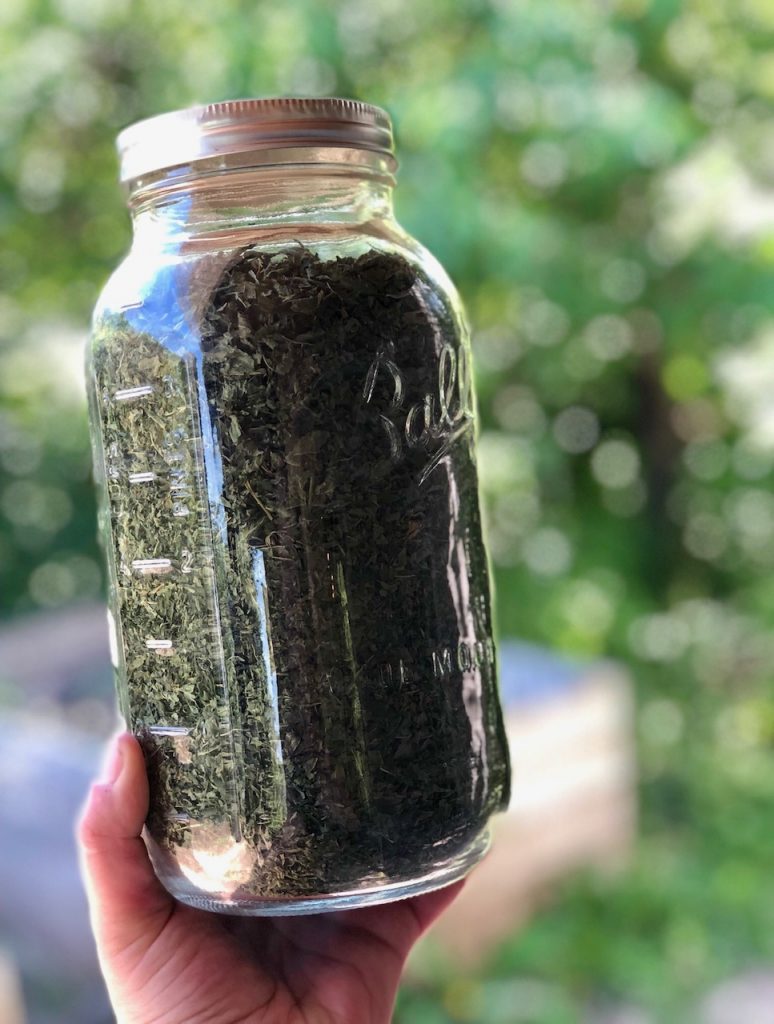
It’s really important to make sure that you’re storing dried goods in an airtight container. Regular mason jar lids do work just fine, but plastic storage lids seem to work just a little better.
Food Preserving: Fermentation
Fermenting foods is the only way of preserving that actually increases nutrient content- it’s a fantastic way to preserve what you’ve grown!
Fermenting is very simple and straightforward, and once your produce is done fermenting, it can be stored in the fridge for months, even a year!
Fermentation Lids
These are special lids that go on top of mason jars that turn them into little fermentation vessels- the idea behind most of them is that they will keep a tight seal and keep critters out of your ferments, but still allow gasses to escape so there’s no jar-explosion-situations.
There are all sorts of different types of these airlock lids available, but the Kraut Source Fermentation Lid is one of the best in my opinion. I love that they are stainless steel and easy to clean. Having sterile, clean supplies is a very important step in fermenting anything! This lid has a spring that pushes your fermenting food underneath the brine so you don’t get any mold.
Ball just came out with a fermentation lid kit as well, which looks really promising and is quite affordable! It features their plastic leak proof lid with a carbon dioxide escape hole added, and a spring to push the food down underneath the brine.
Fermentation Weights
Instead of an airlock style fermentation lid, you can also use fermentation weights. These are little weights that fit perfectly in the top of a mason jar or other vessel and keep all the veggies submerged under the brine.
They are typically made from glass or stone, and I love how simple and versatile they are.
Fermenting Crocks
My family has always made sauerkraut and pickles in big stoneware crocks, and there’s just something so rustic and old-fashioned about them! People have been fermenting their homegrown veggies in these for centuries!
Having a big crock is a great and really efficient way to do a lot of fermenting all at once. For large batches, I prefer a stoneware crock over something like a plastic bucket because I don’t feel it is safe to ferment in plastic.
When buying a new fermentation crock, look for one that isn’t sealed with lead glaze. I like the stoneware crock sets that come with large fermentation weights that sit inside and a lid to cover the crock! A one or two gallon crock is a nice size for a family with a garden.
Salt for Fermenting
Iodized salt should not be used for making fermentation brine, and it should say on the label if your salt is iodized. Use a natural sea salt or kosher salt to ensure your fermentation works like you want it to.

Speaking of salt, since it lasts forever, this isn’t a bad thing to stock-up in general- consider this large 14-pound bucket of good quality sea salt.
Fermenting Resources
There are an amazing number of really great books about fermentation, filled with creative recipes for making the most of your homegrown produce!
Checkout:
Fermented Vegetables
The Farmhouse Culture Guide to Fermenting
Can It & Ferment It!
♥♥♥
I hope this helps, and I hope your gardening year is filled with a lot of successful preserving!
This post may contain affiliate links, which means that if you click through them and end up purchasing an item I may receive monetary or other compensation. The price you pay is unaffected by using this link, and buying stuff you were going to get anyways through an affiliate link is a great way to support your favorite blogger and fellow homesteader! Thanks!