

My parents planted a Christmas tree farm when I was just a young girl, so I grew up learning to make holiday decorations to sell for extra spending money at the tree farm. As a 16-year-old, I was a Christmas craft extraordinaire! And also a really big geek, but that’s a story for a different day. Evergreen Kissing Balls, wreaths, garland… I can make it all! But probably my favorite thing to make is ornaments.
You don’t have to be a talented painter to make these Milkweed Pod Santa Ornaments. And in Wisconsin, the milkweed pods are dried and still clinging to the plants out there, which means it’s time to collect them now in order to make these for Christmas!
Don’t have milkweed pods?! Plan ahead for next year by ordering seeds and planting your own.
Can’t wait? You can purchase dried milkweed pods from several different vendors, try these shops: here and here.
Milkweed is wonderful for many beneficial insects. Save the pollinators and make Christmas crafts! I like to fist-pump as I chant this.
There are some other tutorials available for making these ornaments- but mine are unique because the technique I use lets the texture and shape of the milkweed pod really come through. I don’t like to cover it up with thick paint and a cartoon-like Santa. This also gives the finished ornament a more rustic and primitive look, which I think is ideal because, after all, it is a milkweed pod…
How to make Rustic Milkweed Pod Santa Ornaments
PREPARE AND GATHER SUPPLIES
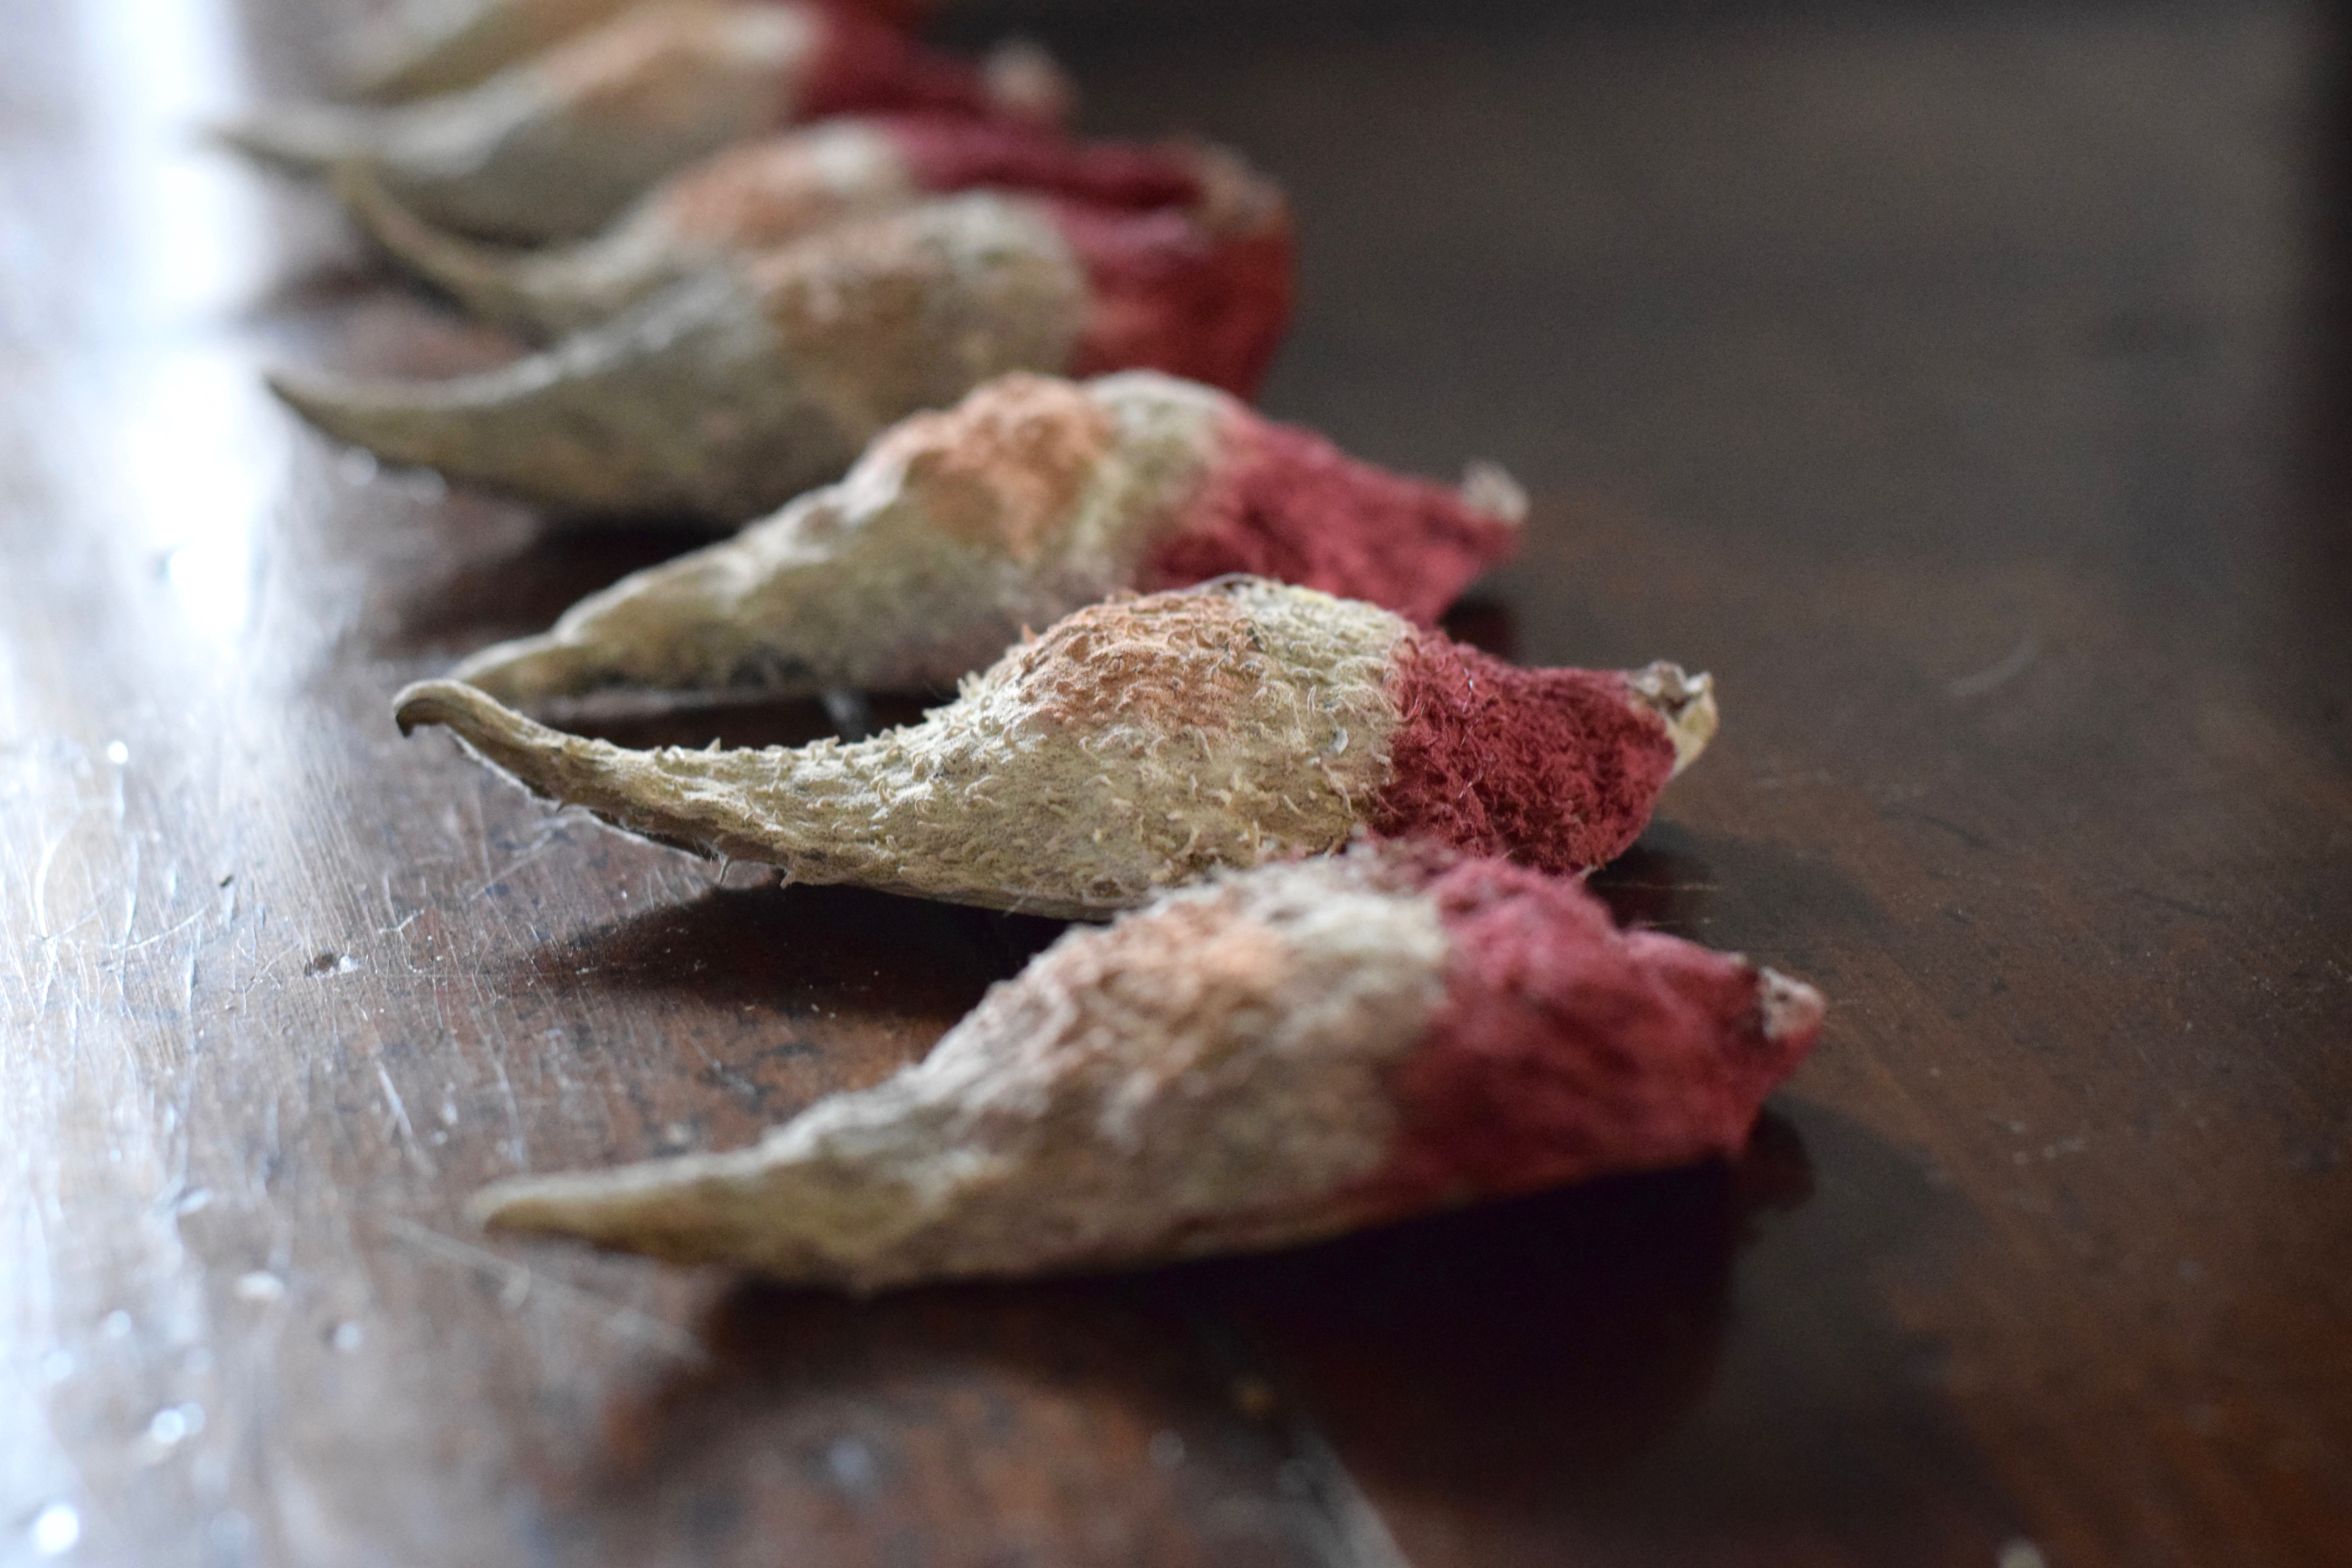
1. Gather milkweed pods
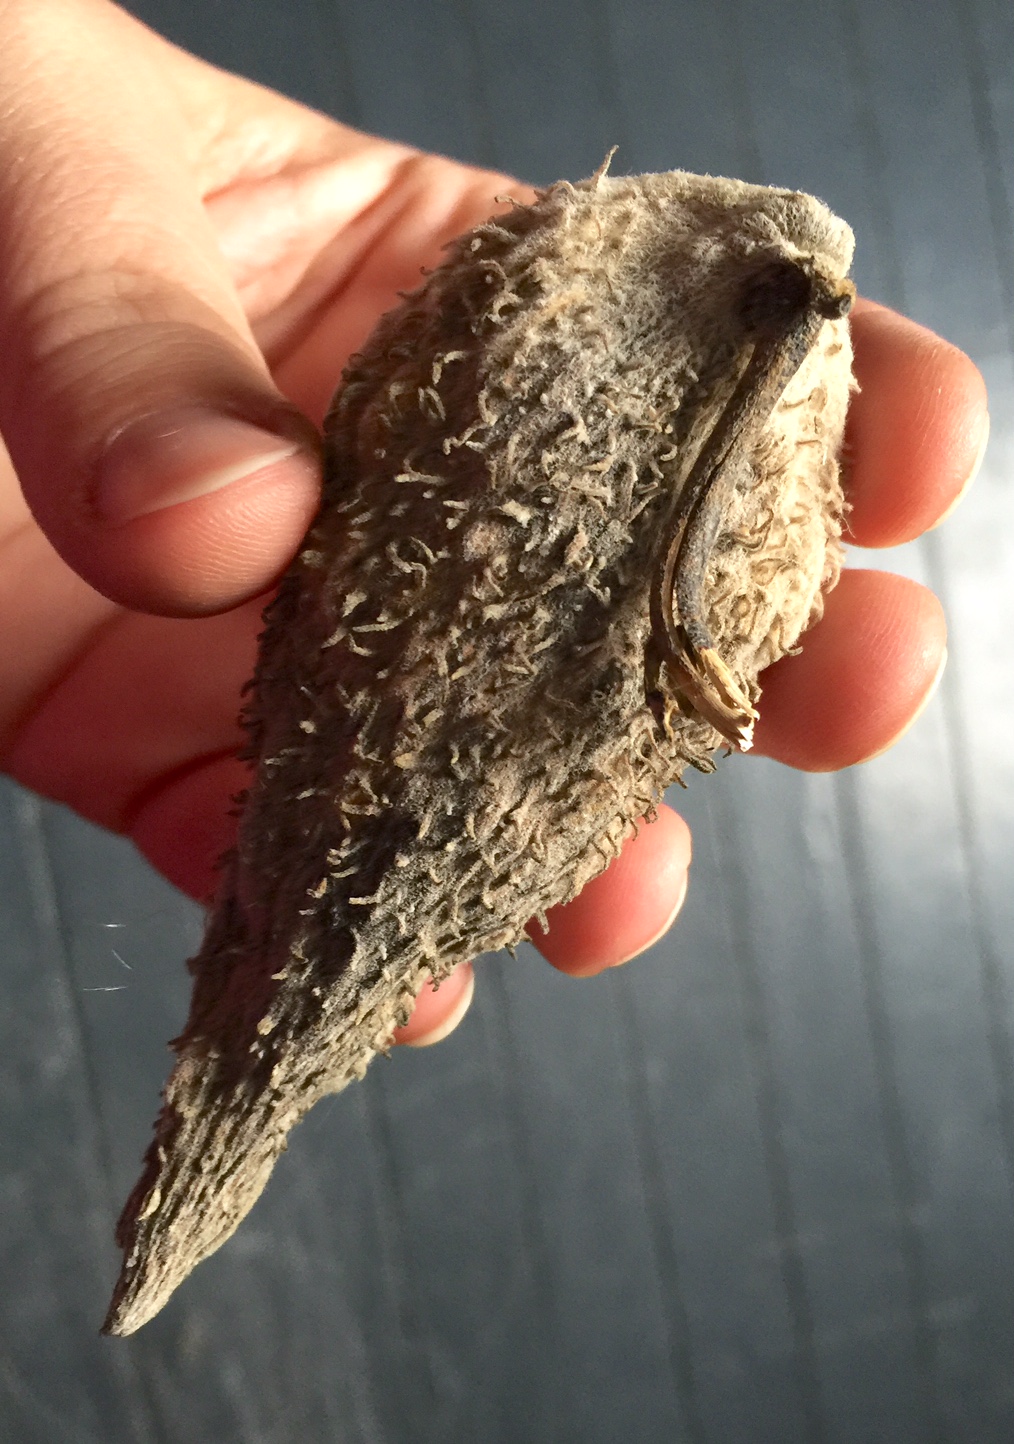
-wait until the milkweed pods are fully brown/grey, dried, and have split open
-look for ones that would make good Santa faces- I prefer the longer ones
-remove the seeds from the pods (and throw the seeds into the wind!)
2. Gather other supplies
-simple craft paints (acrylic) in: maroon red for the hat (the maroon adds a lot of rustic-ness, don’t use bright red), antique white for the beard, and flesh tone color. You will also need a tiny bit of primary red for the mouth and black for the eyes. These are available at craft stores, and even places like Walmart I believe.
–one small-ish paint brush
–rustic jute, twine, hemp rope for hanging
–strong, quick drying gel-type glue (super glue, hot glue, etc)
3. Before painting
In order to put a hanger on the top of the ornament, we have to remove the little stem nubbin on the rounded end of the pod (some have it and some don’t depending on how they were picked). I like to remove this before I paint, because sometimes they don’t come out gracefully, and I end up cracking the pod. I’d hate to crack one I already painted. Just use your fingers to pinch the nubbin and gently wiggle it out.
PAINT THE MILKWEED PODS
If you have some less-than-ideal shaped pods, use them for practice!
My instructions are fairly detailed (I can’t help it!!). So for those of you that like the details, these are for you! If you just want me to leave you alone and let you paint, only read the next few paragraphs and then paint at your own risk.
Six santa pods is a good amount to do in one “batch” at a time (this will make more sense below).
The real trick to painting milkweed pods is in the thickness of the paint, which took me a while to figure out. In a small dish combine about equal parts paint and water. The resulting thickness will depend somewhat on the brand of paint, so feel free to use a little less or more water as you get a feel for the optimal thickness when painting your pods.
The technique for applying the paint is to “dab” or “dot,” not paint in strokes. This, plus the watered down paint is what lets the texture of the pod still show through. If you use strokes it will lay down the little hairs on the milkweed pods and look streaky.
Each pod will turn out different and become a unique little masterpiece!
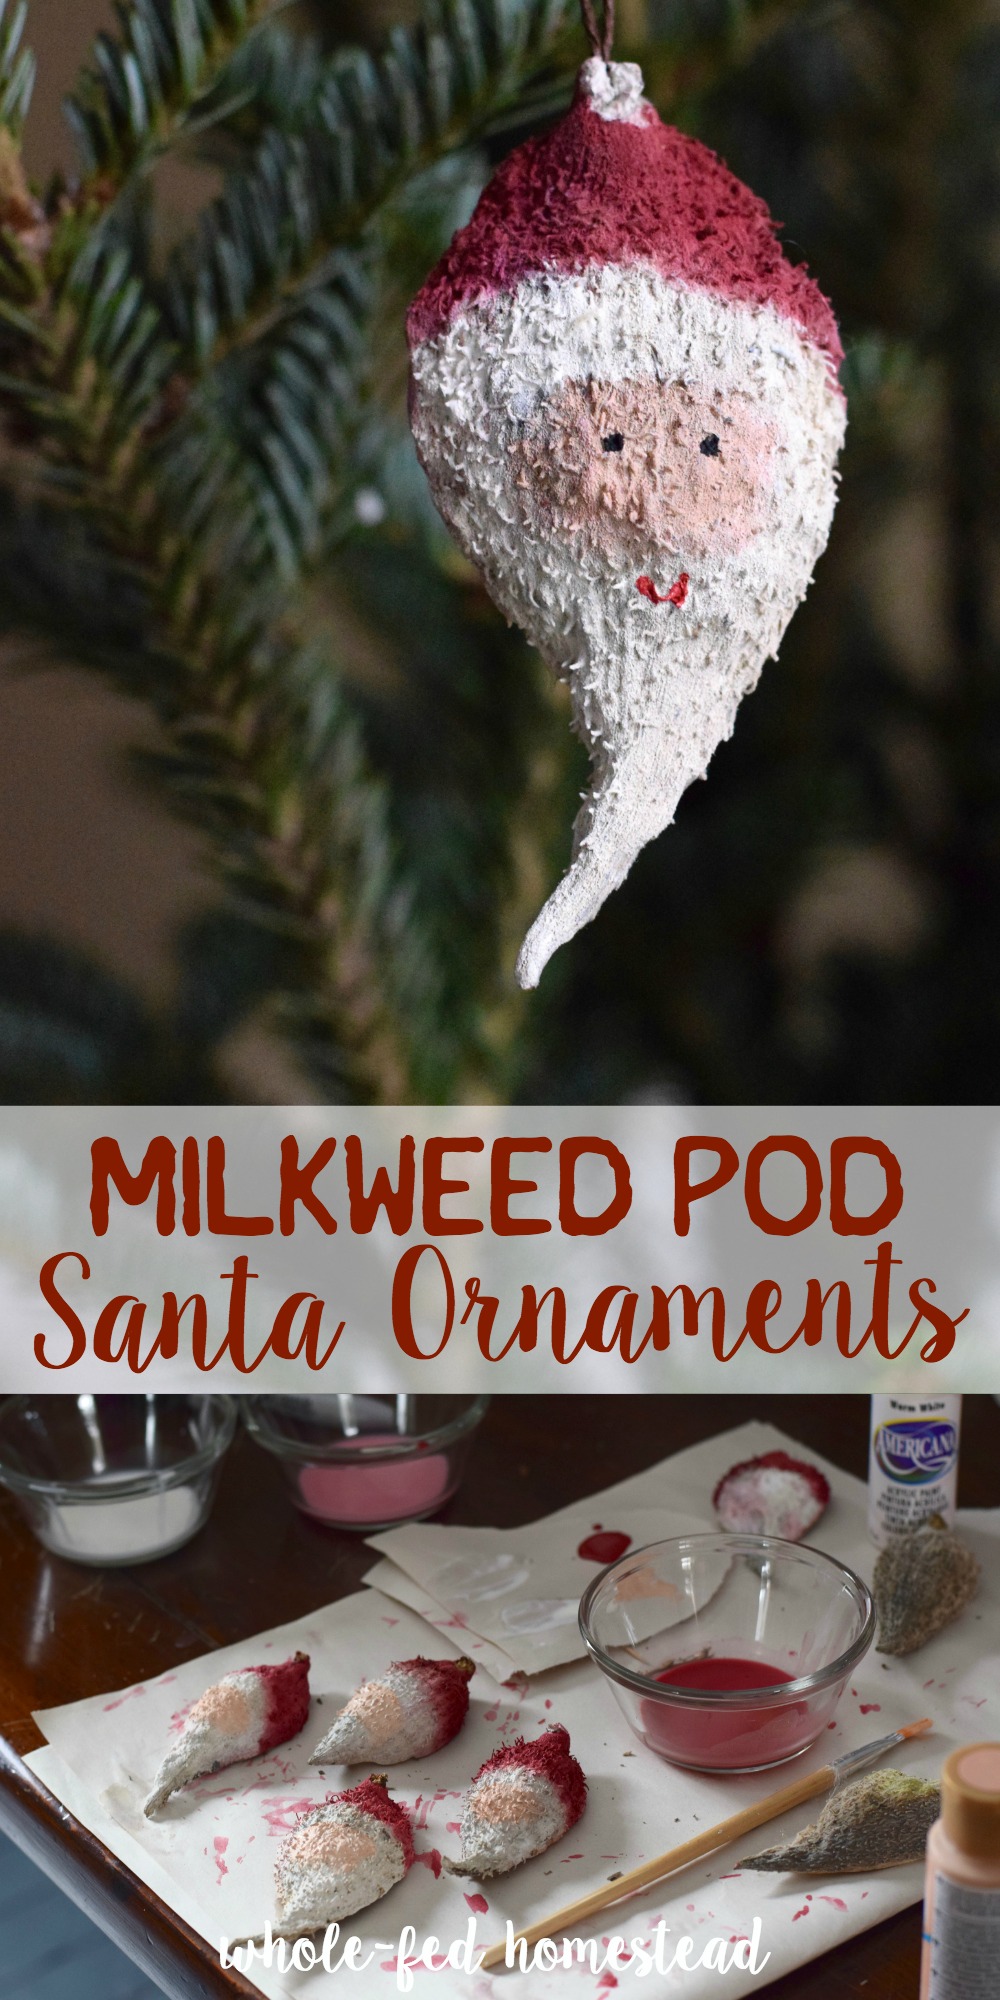
1. Start with Santa’s hat
Determine how big you want the hat, based on the size and shape of your milkweed pod. Take a look at where my maroon hat line starts in the photo below. With just a tiny bit of paint on your brush, paint the line where the hat ends. Note that the line is slightly curved upward. Don’t use a lot of paint here because it can bleed past where you want it.
Okay, now fill in the rest of the hat up to the stem- go ahead and use more paint for the rest.

Special note: I like the maroon hat to dry just a tad before I move on to the white beard and hat trim… so I will go through and paint the maroon hats of a bunch more pods, assembly-line style.
Tip: I keep a clean bowl of water so I can easily clean my brush off and switch colors often!
2. Next paint the white beard
Start at the tip of the beard and work towards the maroon hat line, only because sometimes the colors will bleed together (which is okay!). We just don’t want to end up with an entirely pink beard (which can happen if you drag the red paint down through the white).
3. This is where the artist in you comes out
Most of the pods end up needing a couple coats of each color, especially the white. On the second coats of both the maroon and white, I take the opportunity to adjust where the lines meet, or add more or less paint where I think it needs it.
I also have a paper plate where I squeeze out a little full strength paint. I will use this to cover up areas where the colors bled together a little too much and I want to correct it back to the intended color (this is most-likely to happen at the edges of the pod).
I just keep circling through all the pods, adding paint here or there until they look good… usually three or four coats.
This sounds complicated, and I can’t explain it any better because it is a bit of an art form. However, these milkweed pod ornaments are very forgiving and you should feel free to judge for yourself what you like, and make them your own unique creation. I have found that every single pod turns out differently- which is great!
If you are finding that they are bleeding too much, switch to using only straight, non-watered paint for the last round or two of touch-ups.

See the various stages of painting in the photo above? The three on the left are more dry and have a “dirty old man beard” appearance (which I like!). And just to be clear- on these Santa’s, not in real life. The two on the right have a fresh coat of white paint which will start to soak in and fade.
4. Add Santa’s face
When you think you’re about done with the maroon and white (and it’s okay if it ends up that you’re not), paint on Santa’s face. Do not dilute the flesh-toned paint- use it straight! The best way to determine the position of the face is to look at where the maroon hat meets the white- picture the white as hat trim and put the face right under it. See the above photo for help!
5. Let the pods dry for 30 minutes
Before you put your paints away, let the pods dry for a bit- this is to gauge if they need any final coats of paint. As the paint soaks in, you may find that it isn’t colored enough (especially if it is a particularly dark pod). On a few of mine, I had to use the un-diluted white paint on the last coat to get the color saturation I desired (it doesn’t behave like straight paint at this point because the pod is so wet).
6. Let the pods dry for 24 hours
Once the paint looks how you like it, allow the pods to dry overnight before painting the eyes and mouth and attaching the hanger.
7. The final touches: eyes, mouth, white hat tassel
Again, do not add water to these colors. Start with the mouth- this is best in a brighter, primary red color. Use a pointed toothpick to draw a sort-of crooked smile. Notice that the mouth goes in the white beard area, not in the flesh colored face area! Place it just underneath the flesh colored area.
For the eyes, cut the end off of a toothpick so it is no longer pointed and use this to dot the eyes on with black. If you have a very small brush, you may use this instead.

Use your paint brush to apply a little white paint at the peak of the hat- this will be in the area where you removed the stem nubbin. Just one coat should do.
8. Add the hanger
You can use whatever material you prefer here- but I really like an earthy color skinny roping like this.

Cut about a 6-inch piece and tie the ends together into a strong double knot so you have a loop. Dab some glue onto the back of the pod at the top. There is a natural groove in the top close to where the stem came off- I place the knot just below this and squeeze the rope pieces into the groove (you can kind of see this on the photo above on the second pod from the right).
Now gift your Milkweed Pod Ornament to all the nature-lovers you know!
Want more from the homestead?


This post may contain affiliate links, which means that if you click through them and end up purchasing an item (any item, not necessarily the one I recommended even!) I may receive monetary or other compensation. The price you pay is unaffected by using this link, and buying stuff you were going to get anyways through an affiliate link is a great way to support your favorite blogger and fellow homesteader! Thanks!


Thanks for all the detail…I just love these milkweed Father Time!!!s…we keep ours hanging from a curly willow branch all year long..reminds us how special you are!